Late August on Long Island has a way of making growers second-guess themselves. The plants look close. The weather feels sticky. One day you're proud of the canopy, and the next you're staring at a top cola wondering whether you should cut now or wait one more morning.
That moment is more significant than commonly perceived. If you're asking how do you harvest hemp, the complete answer isn't just “cut the plant.” It's reading the crop correctly, staying compliant, handling flower gently, and getting moisture under control fast enough that the harvest you worked for still smells, smokes, and stores the way it should.
Out here, the local challenge is rarely just growing a good plant. It's finishing one well in a humid coastal climate where small mistakes get expensive fast. A careful harvest can turn a promising field or backyard plot into beautiful flower. A rushed one can flatten aroma, invite mold, or leave you with rough, grassy material that never reaches its potential.
Knowing When to Harvest Your Hemp
A lot of growers hit the same wall near the finish line. The buds are swelling, the plant looks tired in the right ways, and every day feels like it could be the day. That's normal. Harvest timing is part observation, part discipline.
For cannabinoid hemp, the most useful habit is checking the plant the same way each day, ideally in good natural light and then again with magnification. I don't trust one signal by itself. Pistils can shift. Leaves can fade early from stress. The overall plant can look “done” before the flower is ready for harvest.
What the plant is telling you
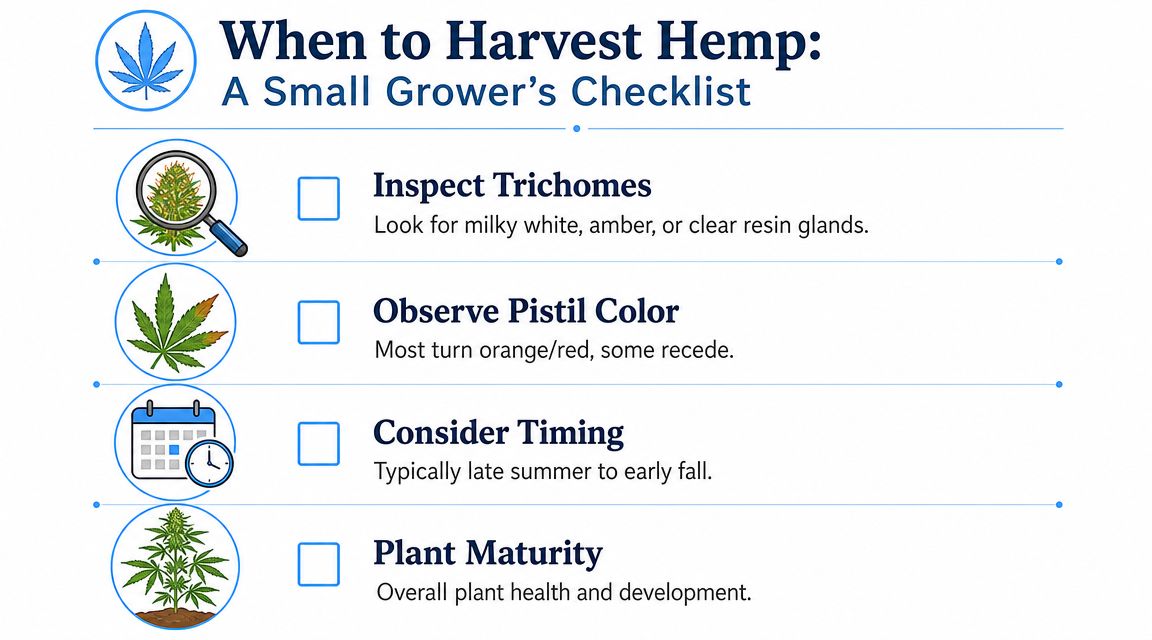
Start with the broad visual cues:
- Pistils changing color: Many growers watch for hairs that have moved away from bright white toward orange or red tones, with some starting to recede.
- Leaf fade: A mature plant often looks less lush than it did at peak veg. Some yellowing or senescence can be part of normal finish.
- Bud structure: Flowers should look developed and intentional, not airy and still building.
- Seasonal timing: On Long Island, late summer into early fall is the window when this question gets serious.
Those signs help, but they're still secondary. The more reliable check is the resin itself.
Trichomes decide
Use a jeweler's loupe or another simple magnifier and inspect the trichomes on the flower, not just the sugar leaves. Clear heads usually mean the plant isn't finished. Milky heads signal ripeness. Amber means you're further along, and the flower is beginning to move past its brightest point.
Practical rule: If you harvest based only on the calendar, you'll miss the plant's actual finish line.
That's one reason flower harvest is handled so differently from fiber or grain. University of Wisconsin guidance notes that for cannabinoid production, plants are usually cut by hand at the base and hung to dry in barns, unlike grain and fiber systems that use mechanized harvest methods, because the gentler handling helps preserve the delicate trichomes that hold the valuable compounds, as outlined in this University of Wisconsin hemp guidance.
Build a repeatable routine
A small grower does better with a repeatable check than with guesswork. Try this:
- Walk the same rows first so you notice daily changes.
- Compare top flowers and lower flowers because maturity can vary across the plant.
- Inspect more than one bud before deciding.
- Keep notes and photos so your eye improves each season.
If you enjoy practical grow education, the archive at Strong Strains blog is worth bookmarking for more plant-level guidance.
Pre-Harvest Testing and NY Compliance
A beautiful crop can still become a problem if you cut before handling compliance correctly. In New York, pre-harvest testing isn't busywork. It's the step that protects the value of the whole run.
Consider the process of pulling a roast at the right internal temperature. The outside can look perfect, but you still check the center before you call it done. Hemp is the same. Before harvest, you need to know your crop is still within the legal definition of hemp, and that means proper testing and documentation.
What to do before the first cut
Keep this part simple and organized:
- Know your testing window: Don't wait until your crew is ready with shears and drying space. Plan your sample timing early enough that you can make decisions without panic.
- Use a reputable lab: You want a lab that handles cannabis and hemp work regularly and gives you clear documentation.
- Store your paperwork: Keep your certificate of analysis with the rest of your cultivation records. If anyone ever asks questions, you want clean files, not a scavenger hunt through old emails.
Why compliance is worth taking seriously
The biggest mistake I see in small grows is treating testing like a hurdle instead of crop protection. It's closer to insurance than red tape. You've already paid in time, labor, nutrients, and attention. Testing is how you protect that investment.
That same mindset applies to the broader business side of agriculture. If you're thinking seriously about protecting your New York farm from weather, equipment, and liability issues, that resource gives a useful overview of how growers think about risk before disaster forces the lesson.
Keep your compliance documents where your harvest plan lives. If your records are scattered, your operation is scattered.
For readers who are newer to legal cannabis questions, the answers at Strong Strains FAQs can help clear up terminology and consumer-facing rules without the usual confusion.
What works and what doesn't
A calm, legal harvest usually comes from boring habits. Good notes. Good labels. Good timing. Confirmed test results before the chop.
What doesn't work is harvesting first because the weather forecast looks ugly and hoping the paperwork can catch up later. On Long Island, that kind of rush feels tempting. It's still a bad bet.
The Art of Cutting Your Hemp Plants
Once the crop is ready and your paperwork is squared away, the job becomes physical. Here, quality-focused growers separate themselves from people who only think about speed.
For premium flower, I favor a careful hand harvest every time.
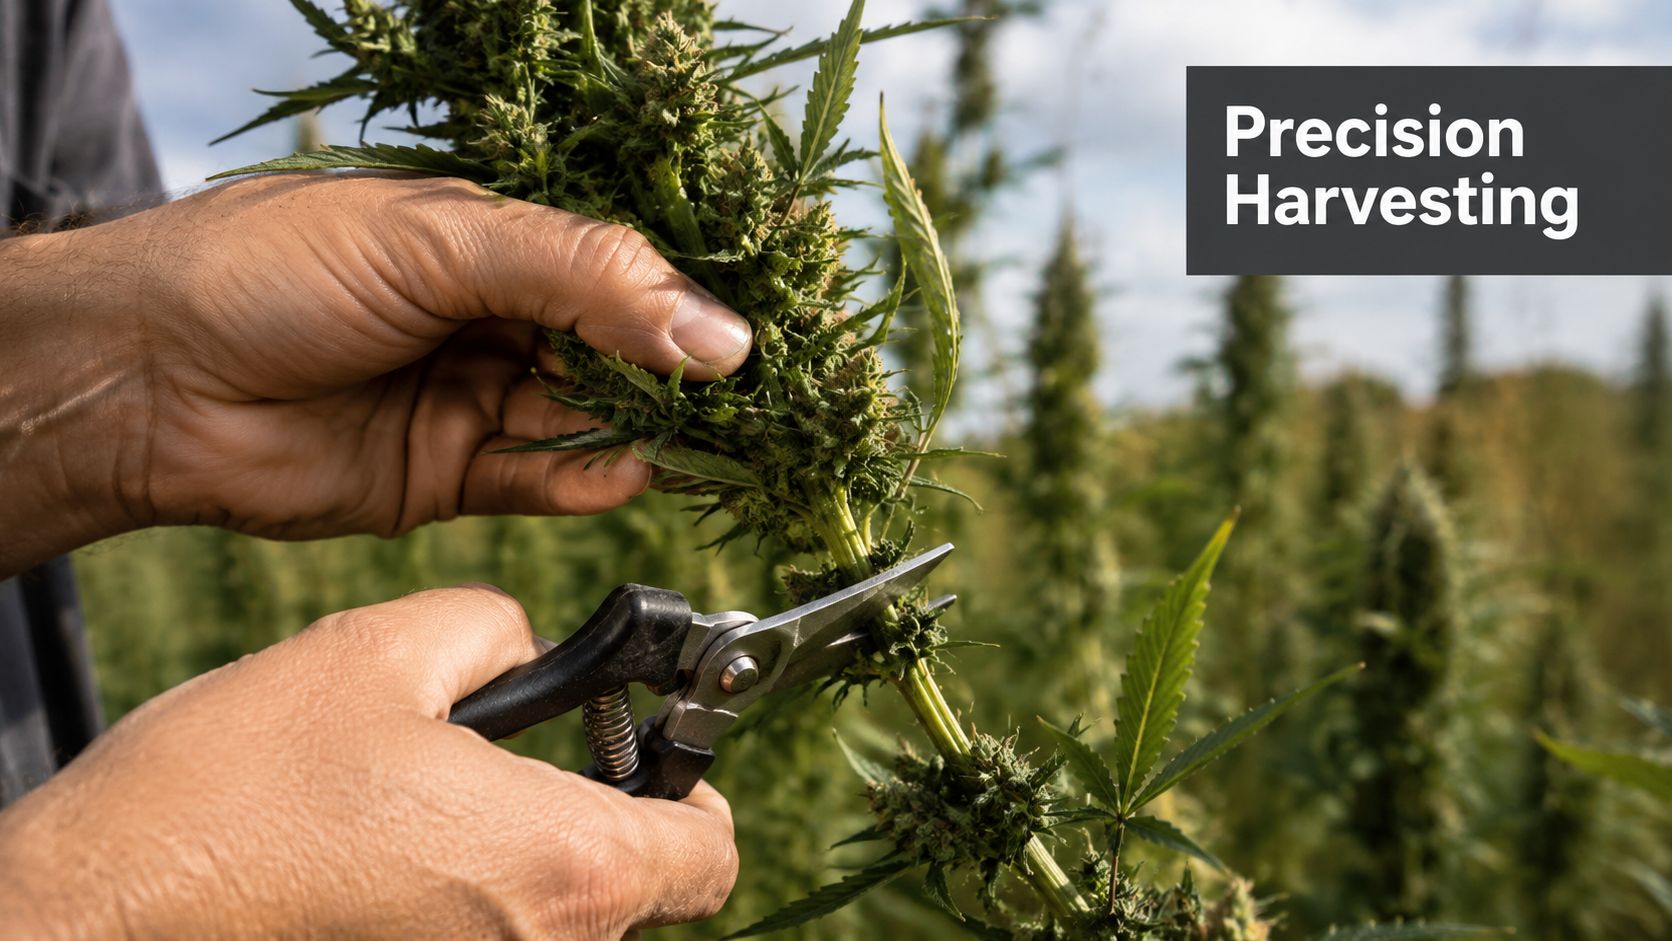
Hand-cutting takes longer, but it gives you cleaner handling, better selectivity, and less abuse to the flower. That matters when the harvest value is tied to appearance, aroma, and intact resin. If you're growing for cannabinoid-rich flower, rough treatment costs you.
Hand harvest versus field harvest
The contrast gets sharp when you compare flower production with fiber systems. Nebraska Extension notes that for fiber production, stalks are mowed and can be left in the field for up to five weeks for retting, where microbes loosen fibers. That's useful for industrial processing, but it's the opposite of what quality flower needs. Cannabinoid material needs to move into controlled drying quickly, as explained in Nebraska hemp harvest guidance.
Here's the practical comparison:
| Harvest style | Best for | Main benefit | Main drawback |
|---|---|---|---|
| Hand-cutting at the base | Premium cannabinoid flower | Protects trichomes and lets you select each plant | Slower and more labor-intensive |
| Mowing or broad mechanized cutting | Fiber-focused production | Efficient over larger acreage | Too rough for top-shelf flower |
| Mixed, rushed harvest | Nothing good | Feels fast in the moment | Usually creates handling and drying problems |
Tools that actually help
You don't need a fancy setup. You need clean tools and a plan.
- Heavy-duty shears: Best for thick bases and mature stems.
- Pruning snips: Useful when you're taking branches in sections.
- Clean bins or tarps: Keep cut plants off wet ground and away from debris.
- Gloves: They help with grip and keep the flower cleaner.
- A staging area already prepared: Don't start cutting until you know exactly where each plant is going next.
A practical field method used by growers is to cut whole plants at the base with heavy-duty shears or a hedge trimmer, then hang them upside down before bucking branches and trimming once they've dried enough to handle cleanly. That approach works especially well for smaller Long Island grows where quality matters more than throughput.
How to cut without beating up the flower
Work early if you can, before the day turns hot and sticky. Cut deliberately. Hold stems, not buds. Move the plant as few times as possible.
The best harvest crews look slow until you compare their finished flower to everyone else's.
A quick visual on careful harvest technique helps here:
What doesn't work is piling fresh-cut plants into a heap, dragging branches across dirty surfaces, or letting harvested material sit around while you “figure out” the drying room. By then, you're already behind.
Drying and Curing for Maximum Flavor
Most harvest problems don't announce themselves in the field. They show up later in the dry room. Flower that looked excellent on cut day can lose aroma fast if moisture leaves unevenly or too slowly.
On Long Island, growers earn their keep. Humid air turns a simple drying plan into a real operational decision.
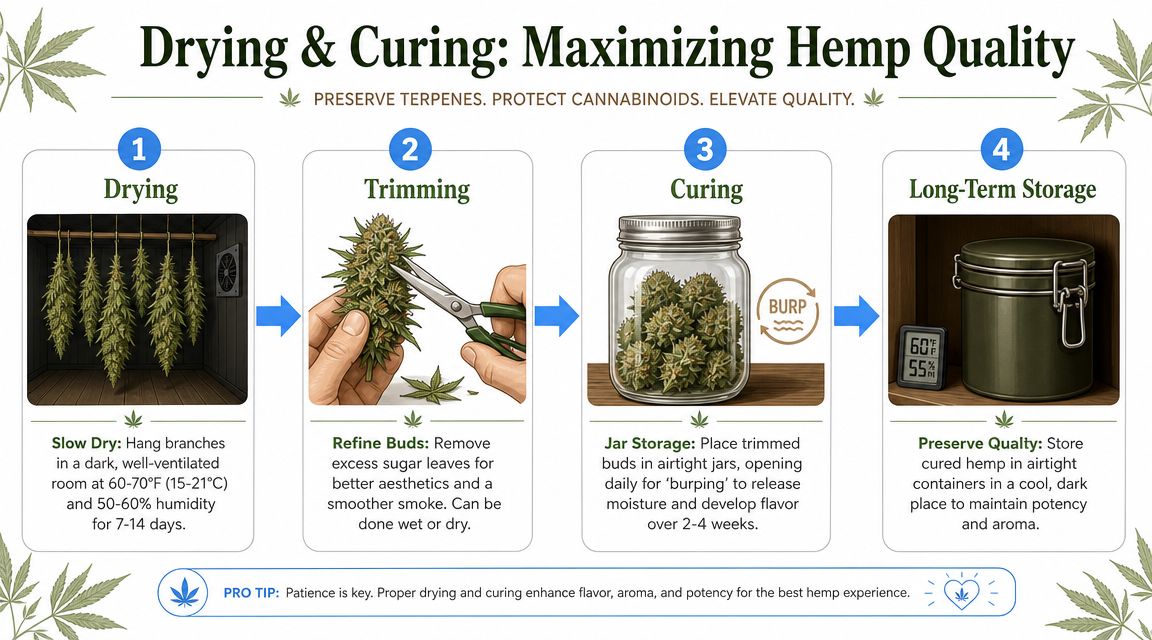
Drying is a race against the wrong moisture
Industry guidance recommends getting harvested biomass or flower into a drying setup quickly, then drying for roughly 3 to 7 days while keeping the temperature below about 75°F, with plants spaced so they don't touch and airflow managed to reduce mold risk, according to this hemp drying guide from ACS Laboratory.
That guidance lines up with what small growers learn fast in this region. Crowded lines, poor air exchange, and “it'll dry eventually” thinking are what create mold headaches.
A solid drying room usually includes:
- Darkness: Light doesn't help you here.
- Spacing: Branches or whole plants shouldn't touch.
- Air movement: Gentle circulation is better than blasting flower directly.
- Moisture removal: A dehumidifier often matters more than people want to admit.
The difference between drying and curing
Drying removes enough moisture to make the flower safe to handle and stable enough for the next phase. Curing is slower and more patient. It's where the flower settles, harshness drops, and aroma rounds out.
This is why rushed flower often smells flat. It was dried badly, jarred too soon, or never really cured at all.
If the dry is sloppy, the cure can't save it.
For premium flower, a low-and-slow mindset wins. The goal isn't to make it dry as fast as possible. The goal is to make it dry evenly enough that the outside doesn't crisp while the center stays too wet.
What quality-focused growers choose
You'll hear debates over whole-plant hanging versus branch drying. Both can work if the room is right. What matters more is consistency. A grower who checks airflow, spacing, and room conditions every day will beat the grower with “better gear” and worse habits.
That patience is part of what separates forgettable flower from something with the polish people expect from respected names like Ayrloom or Hudson Cannabis. Good genetics matter. Good finishing matters just as much.
Trimming and Storing Your Final Product
Trimming is the last place you can improve presentation without faking anything. It won't rescue weak flower, but it will reveal good flower properly.
For most small growers chasing quality, dry trimming is the better choice. The leaf has tightened up, the bud shape is easier to respect, and you're less likely to over-strip the flower. Wet trimming can move faster, but it often leaves the finished product looking too worked over.
How to trim cleanly
Set up a comfortable station and work in batches. Keep your finished flower separate from trim from the start.
- Use sharp scissors: Dull blades tear instead of cut.
- Trim for structure, not vanity: Remove what distracts from the bud. Don't carve away good flower for a showroom look.
- Sort as you go: Keep top flower, smalls, and trim in separate containers.
- Clean your tools often: Sticky blades make sloppy cuts.
That clean finish is part of what gives artisan flower the visual confidence people associate with brands like Claybourne Co. or Connected. Good bag appeal isn't hype when it reflects careful handling.
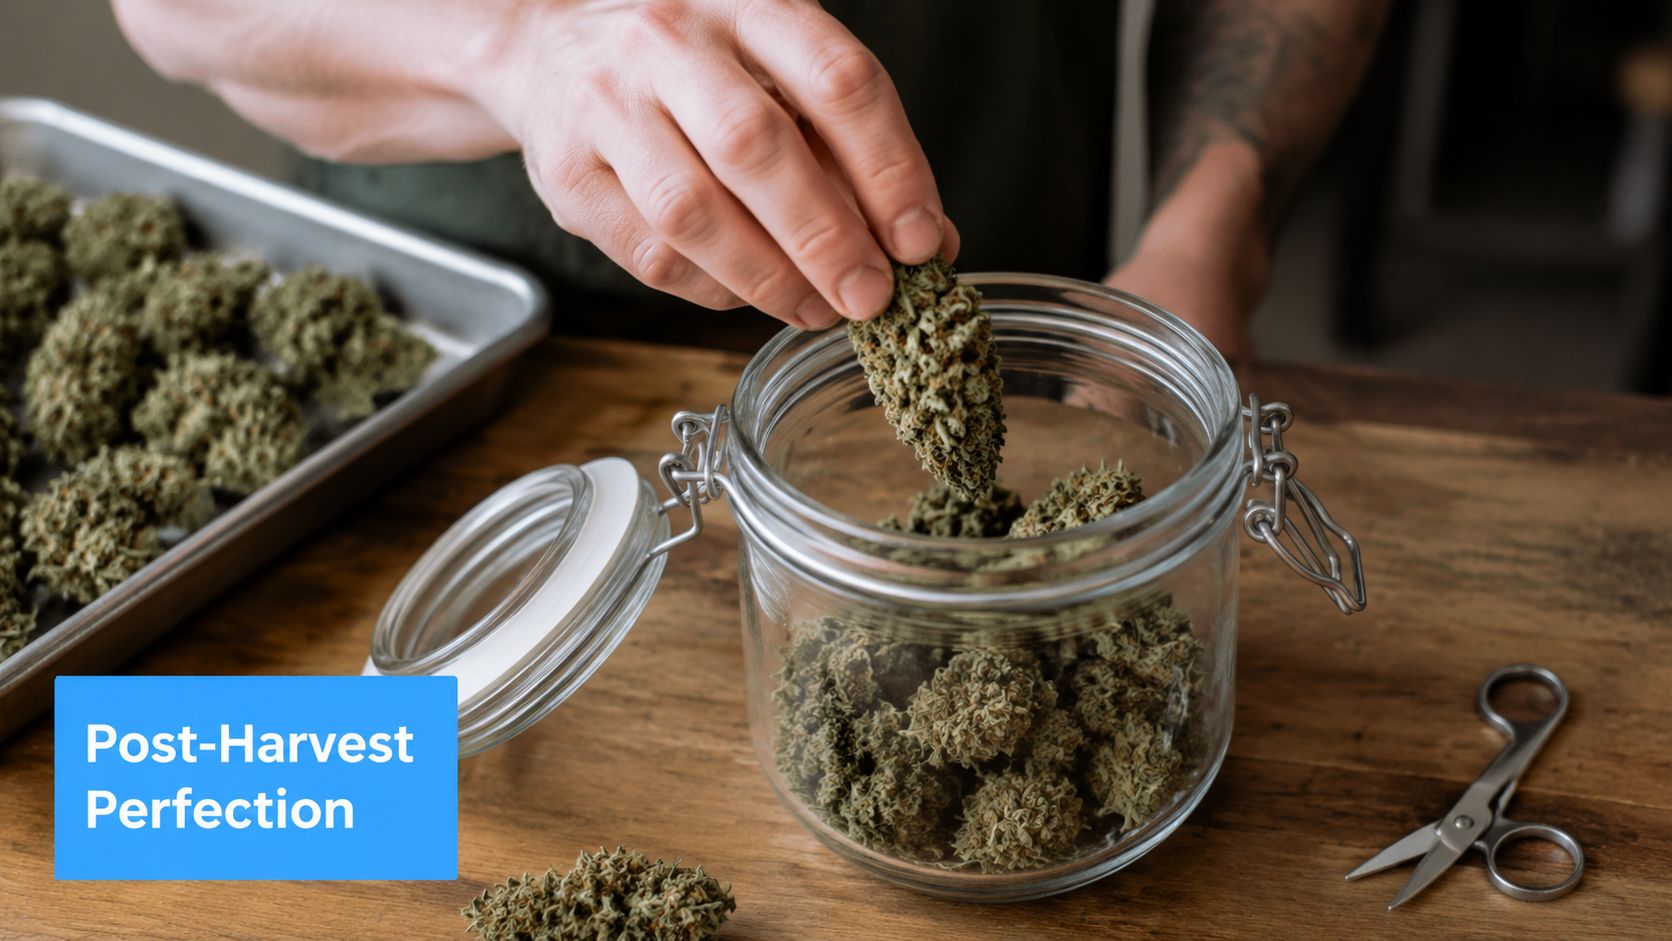
Storage is where Long Island humidity tries to win
Missouri Extension advises that cannabinoid hemp should be dried to 10 to 12% moisture within 48 hours to prevent mold, which tells you how narrow the margin can be once harvest is underway, especially in a damp climate, as noted in this Missouri Extension hemp publication.
That's the bottleneck. Not cutting the plant. Not even trimming it. It's getting moisture under control fast enough that the crop doesn't spoil while still preserving quality.
A simple storage table keeps the priorities straight:
| Stage | What you want | What to avoid |
|---|---|---|
| Freshly dried flower | Even dryness and no hidden wet pockets | Jarring too early |
| Early cure | Airtight glass containers in a cool, dark place | Heat, sunlight, frequent rough handling |
| Longer storage | Stable environment and minimal disturbance | Plastic bags, warm rooms, moisture swings |
There's a useful lesson here from other crop systems too. Farmers who work to improve silage quality understand that post-harvest handling often decides the final result more than the cut itself. Hemp flower is no different. Finishing discipline is where value gets protected or lost.
From Your Garden to Our Shelves
A successful hemp harvest is really a chain of decisions. You read the plant instead of guessing. You handle testing and paperwork before the chop. You cut gently, dry with intention, and trim with enough restraint that the flower still looks alive.
That's what quality looks like in practice. Not flashy tricks. Not miracle products. Just a series of right moves made at the right time.
For Long Island growers and curious consumers, that's also the bridge between homegrown understanding and dispensary standards. The reason top-shelf flower stands out isn't just genetics. It's the finish. It's the care taken after the plant leaves the soil.
If you've got questions about what polished flower should look, smell, and feel like in the jar, or you want to talk through the difference between decent harvest work and excellent harvest work, reach out through Strong Strains contact page. Seeing well-finished products from brands like Jeeter and Runtz can sharpen your eye fast, especially if you're learning what great post-harvest handling really produces.
The best growers stay teachable. That never changes.
If you want premium cannabis selected by people who care about harvest quality, shop Strong Strains for lab-tested flower, vapes, concentrates, edibles, tinctures, topicals, and accessories on Long Island. Visit us in East Setauket, place an order for pickup or local delivery, and sign up for the newsletter to hear about new drops, top sellers, and exclusive deals first.